Let's build a ruleset for Bazel! Getting started and setting up the development environment


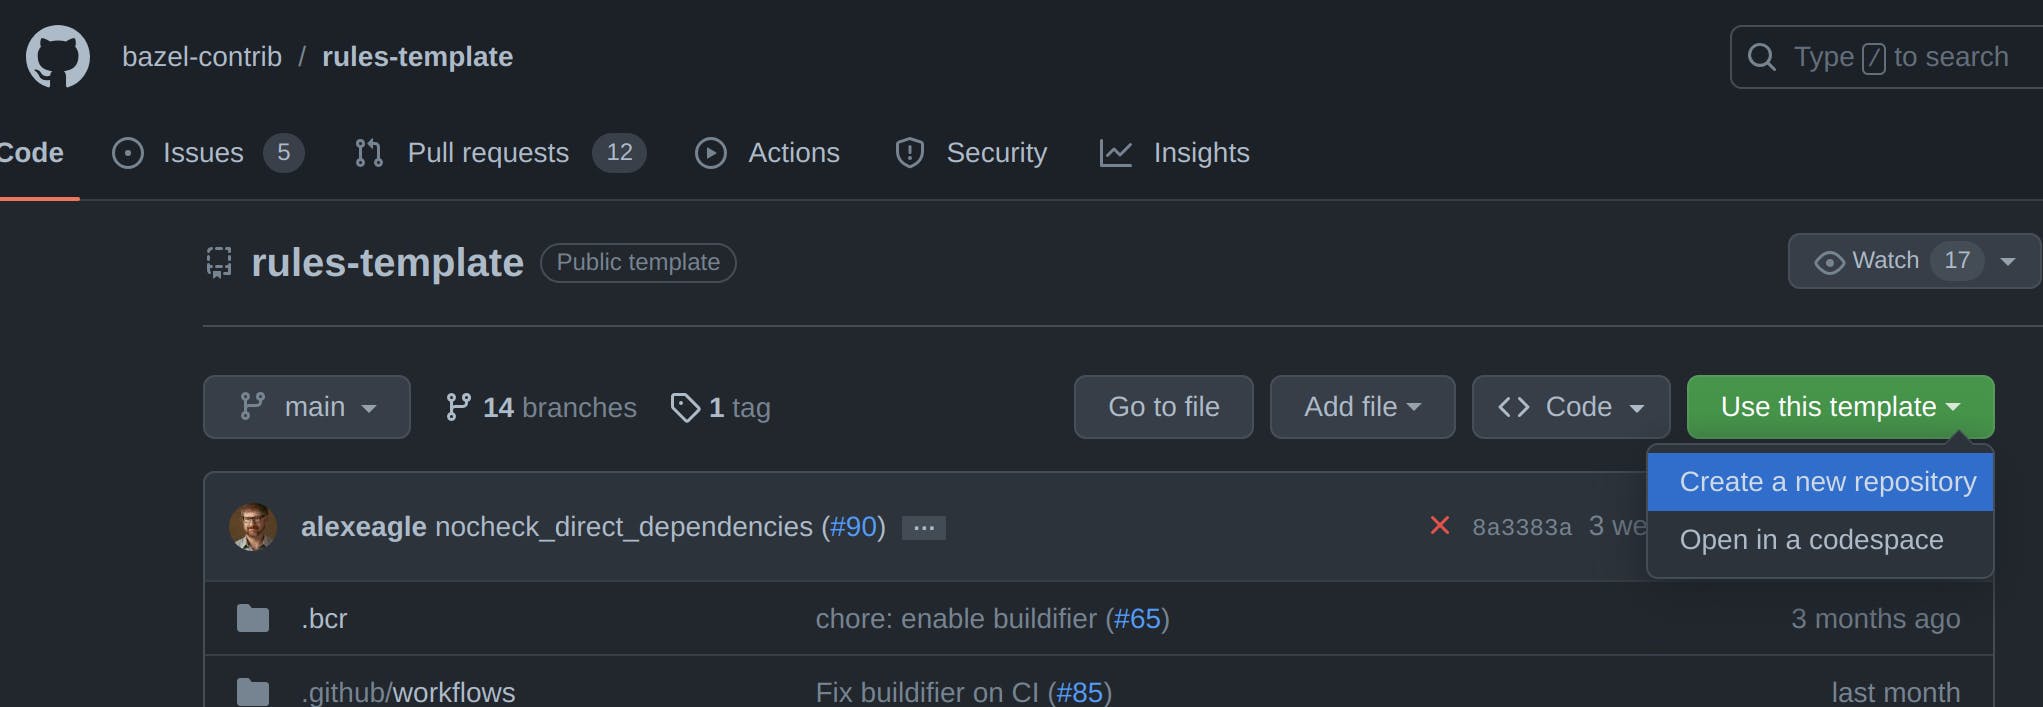
Well, it's about time we start writing some code, but before getting started we are going to need a repository to work on. Luckily, there's a template we can start from in bazel-contrib/rules-template. This template is quite awesome as it sets up a bunch of things out of the box, including CI/CD, docs generation and testing. Creating a new repository from a template is as simple as clicking on the Use this template dropdown and then click on Create a new repository as shown below.
Once we have created a new repository from this template we will just follow the steps in the README.
Initial repository setup
I am personally a big fan of devcontainers, fully containerized development environments for vscode. For starters, using devcontainers makes it trivial to spin up identical development environments over and over again so you will only ever need to spend the effort to create a development setup once and from there on everyone can contribute to your project immediately with just a few clicks.
Not only that but devcontainers guarantee consistent behaviors across different workstations and OSes, thus making it easier for me to switch to my laptop when I am home or the work laptop when I am travelling. Finally, when on my work laptop I can use github's codespaces so that I won't even need to clone the project locally!
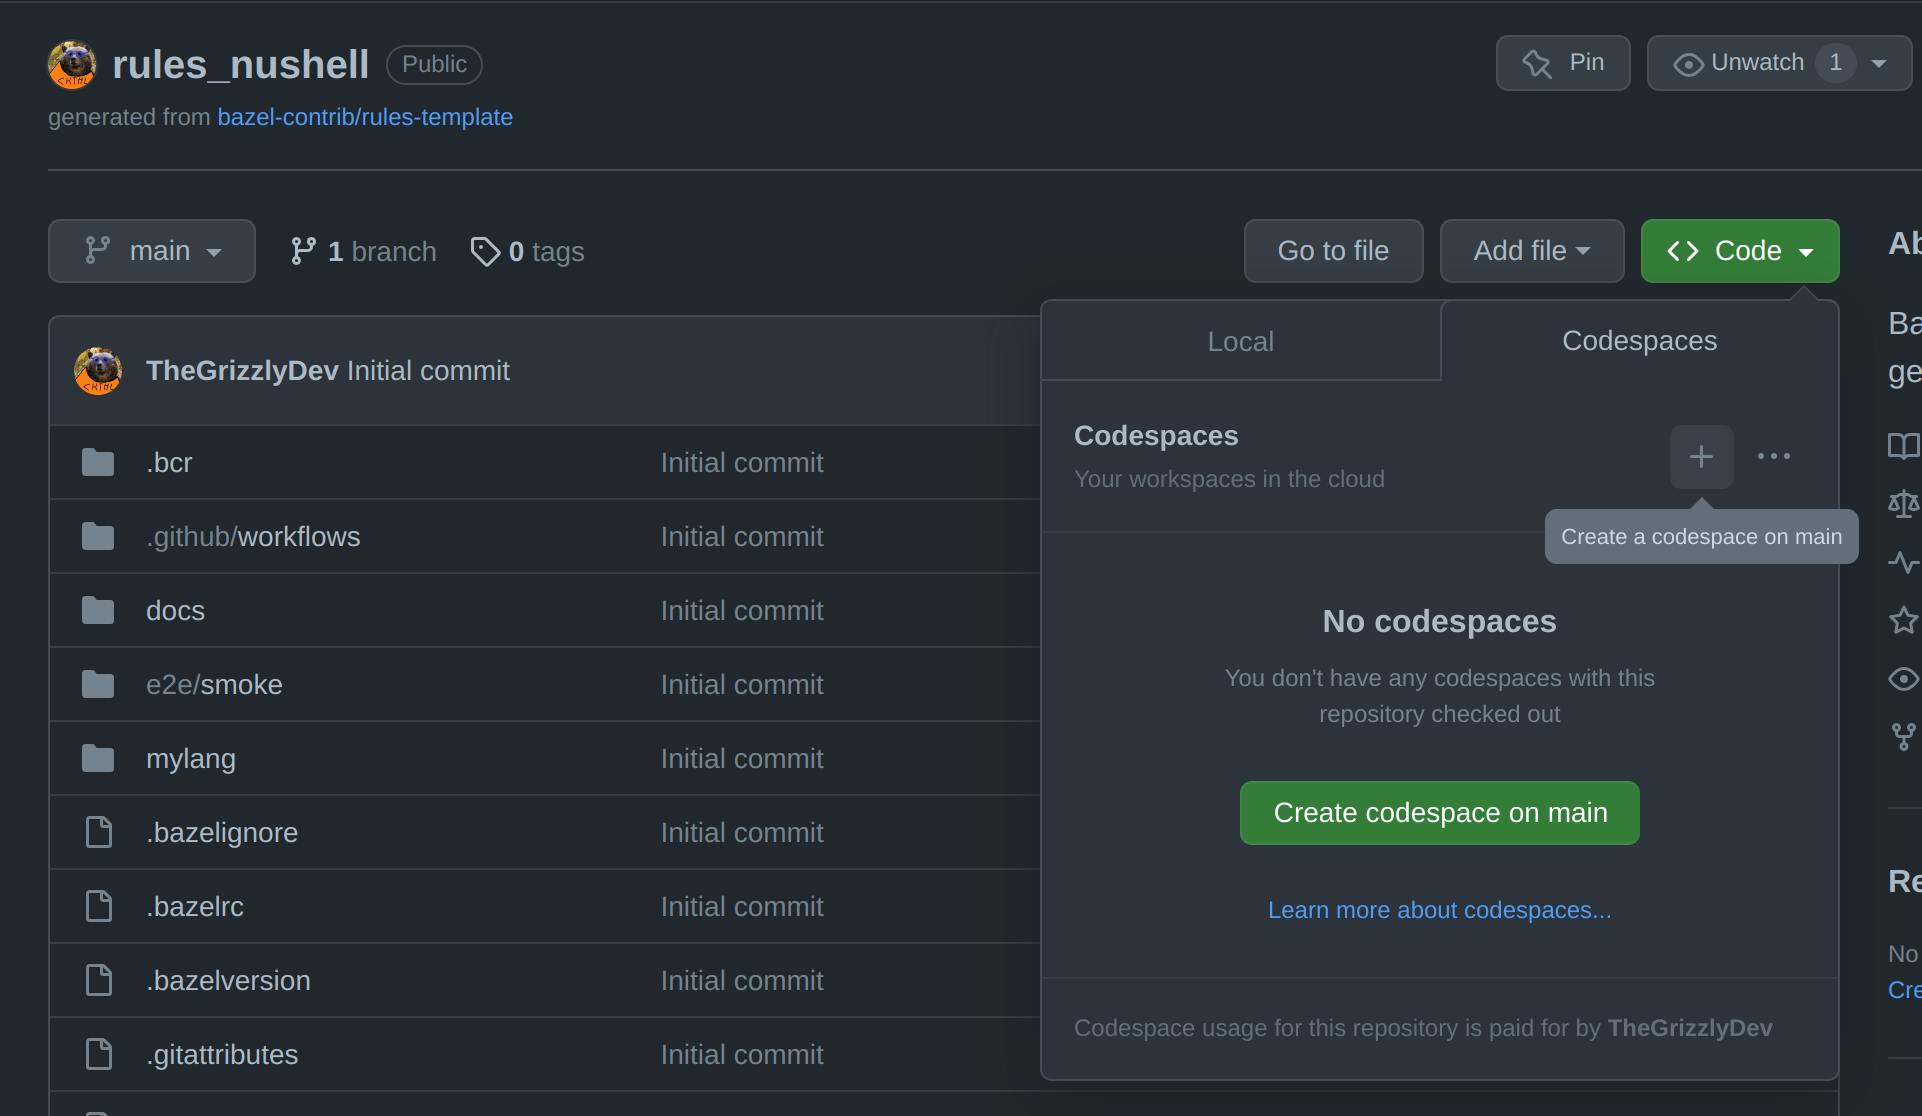
Creating and running a new codespace is very trivial and just a few clicks away. Click on the Code button on the right side, then once the popup window opens switch over to the Codespaces button and press + .
There are multiple ways to configure devcontainers. For this project I will not need anything too complex: a container that installs bazelisk, bazel's de-facto standard version manager, pre-commit and a bunch of vscode's extensions to add basic support for bazel and docker (used for the devcontainer itself).
Let's start by creating the main configuration entrypoint for devcontainers in .devcontainer/devcontainer.json
{
    "build": {
        // instructs devcontainers to use a Dockerfile
        // rather than a pre-defined image
        "dockerfile": "Dockerfile"
    },
    "customizations": {
        "vscode": {
            "extensions": [
                "ms-azuretools.vscode-docker", // docker support
                "BazelBuild.vscode-bazel"      // bazel support
            ]
        }
    },
    // sets up pre-commit hooks
    "postStartCommand": "pre-commit install"
}
With this, we only need to set up a docker image with bazelisk and pre-commit installed. We can do so by adding .devcontainer/Dockerfile
FROM mcr.microsoft.com/devcontainers/base:bookworm

# Download bazelisk and place it in $PATH
RUN wget https://github.com/bazelbuild/bazelisk/releases/download/v1.18.0/bazelisk-linux-amd64
RUN chmod +x bazelisk-linux-amd64
RUN mv bazelisk-linux-amd64 /usr/local/bin/bazel

# Install python3 and pip to setup pre-commit
RUN apt update && apt install -y --no-install-recommends \
    python3-setuptools \
    python3-pip \
    python3-dev \
    python3-venv

# Install pre-commit
RUN pip install --break-system-packages pre-commit
The last step is to replace all the various placeholders that the template leaves around with the name of the ruleset, github-org and language used by the ruleset as follows:
for file in $(git ls-tree -r HEAD --name-only); do
    sed -i "s/com_myorg_rules_mylang/rules_nushell/g" "${file}"
    sed -i "s/myorg/TheGrizzlyDev/g" "${file}"
    sed -i "s/mylang/nushell/g" "${file}"
done
mv mylang/ nushell/
Next steps
This gives us a good starting point to author a ruleset and in the next post we will look into a minimal implementation of genrule using nushell as the backend.
I will likely push this setup to the upstream template repo so that it can be reused without any manual intervention.